Originally published on Notion.
This is the original article with a few markup changes and spelling fixes.
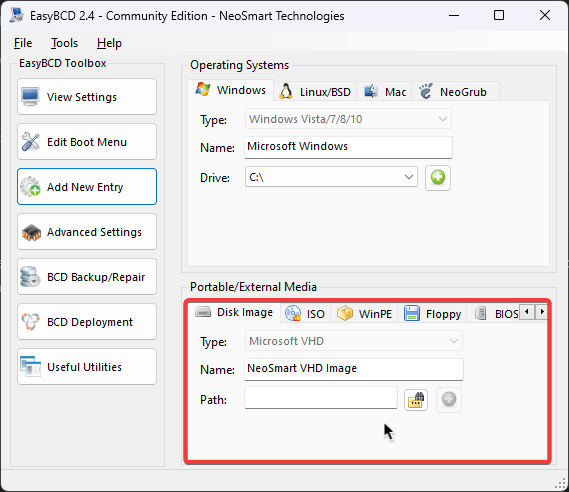
Back in my high school days when I had way more time, I was toying around with my computer and with a couple of VMs and tools like EasyBCD and found the Windows bootloader is capable of booting from hard drive images.
I’ve later found the Microsoft’s OEM documentation on how to do this properly.
Microsoft’s guide is tailored to OEMs setting this up from Windows PE and isn’t necessarily tailored for the power user. So I thought I’d write things my own way to make this more accessible.
This is how I’m getting my streaming setup to work, so let’s begin.
Let’s Get Into It
Creating a virtual hard drive
diskpart is quite dangerous to use and can wipe your disk if you’re not careful. Use list to make sure you’re operating on the right disk or volume.
Open a terminal as an administrator (Win X → Terminal (Admin)) and run diskpart.
In diskpart, run the following to create a VHDX file.
create vdisk file="C:\Multiboot\Stream.vhdx" type=expandable maximum=180000
We then need to format the disk.
attach vdisk
create partition primary
format fs=ntfs label="Stream" quick
assign letter=v
You can now exit from diskpart.
Installing Windows
Next up grab a Windows 11 ISO and mount it on your system. Once the image is mounted, you can now apply the image to the virtual hard drive.
First check which edition you’d like to install with the following command and take note of the index numbers:
dism /get-wiminfo /wimfile:"X:\sources\install.wim"
dism /get-wiminfo output
Deployment Image Servicing and Management tool
Version: 10.0.22621.1

Details for image : X:\sources\install.wim

Index : 1
Name : Windows 11 Home
Description : Windows 11 Home
Size : 16,509,169,302 bytes

Index : 2
Name : Windows 11 Home N
Description : Windows 11 Home N
Size : 15,846,970,562 bytes

Index : 3
Name : Windows 11 Home Single Language
Description : Windows 11 Home Single Language
Size : 16,511,179,323 bytes

Index : 4
Name : Windows 11 Education
Description : Windows 11 Education
Size : 16,781,380,608 bytes

Index : 5
Name : Windows 11 Education N
Description : Windows 11 Education N
Size : 16,120,610,930 bytes

Index : 6
Name : Windows 11 Pro
Description : Windows 11 Pro
Size : 16,796,549,892 bytes

Index : 7
Name : Windows 11 Pro N
Description : Windows 11 Pro N
Size : 16,118,481,221 bytes

Index : 8
Name : Windows 11 Pro Education
Description : Windows 11 Pro Education
Size : 16,781,330,818 bytes

Index : 9
Name : Windows 11 Pro Education N
Description : Windows 11 Pro Education N
Size : 16,120,560,240 bytes

Index : 10
Name : Windows 11 Pro for Workstations
Description : Windows 11 Pro for Workstations
Size : 16,781,355,713 bytes

Index : 11
Name : Windows 11 Pro N for Workstations
Description : Windows 11 Pro N for Workstations
Size : 16,120,585,585 bytes

The operation completed successfully.
Then apply said image onto the virtual hard drive.
dism /apply-image /imagefile:"X:\sources\install.wim" /index:4 /applydir:V:\
Adding it to the boot menu
Next up, we need to add Windows to the boot menu.
bcdboot V:\Windows
And that’s it! This sets it as the default OS and it will now get picked up next time you reboot.
Renaming the new installation
You can also change the name of the new installation.
List out the boot entries with bcdedit /v and copy the identifier of the entry referring to the VHDX file.
bcdedit /v output
Windows Boot Manager
--------------------
identifier              {9dea862c-5cdd-4e70-acc1-f32b344d4795}
device                  partition=\Device\HarddiskVolume1
path                    \EFI\Microsoft\Boot\bootmgfw.efi
description             Windows Boot Manager
locale                  en-us
inherit                 {7ea2e1ac-2e61-4728-aaa3-896d9d0a9f0e}
default                 {cc33f9c6-fe8b-11ed-a1cd-683e26c558cc}
resumeobject            {cc33f9c5-fe8b-11ed-a1cd-683e26c558cc}
displayorder            {cc33f9c6-fe8b-11ed-a1cd-683e26c558cc}
                        {4ae36b77-a304-11ed-beaa-d8a5cf26f6ec}
toolsdisplayorder       {b2721d73-1db4-4c62-bf78-c548a880142d}
timeout                 30

Windows Boot Loader
-------------------
identifier              {cc33f9c6-fe8b-11ed-a1cd-683e26c558cc}
device                  vhd=[C:]\Multiboot\Stream.vhdx,locate=custom:12000002
path                    \windows\system32\winload.efi
description             Windows 11
locale                  en-us
inherit                 {6efb52bf-1766-41db-a6b3-0ee5eff72bd7}
isolatedcontext         Yes
allowedinmemorysettings 0x15000075
osdevice                vhd=[C:]\Multiboot\Stream.vhdx,locate=custom:22000002
systemroot              \windows
resumeobject            {cc33f9c5-fe8b-11ed-a1cd-683e26c558cc}
nx                      OptIn
bootmenupolicy          Standard

Windows Boot Loader
-------------------
identifier              {4ae36b77-a304-11ed-beaa-d8a5cf26f6ec}
device                  partition=C:
path                    \WINDOWS\system32\winload.efi
description             Windows 11
locale                  en-GB
inherit                 {6efb52bf-1766-41db-a6b3-0ee5eff72bd7}
recoverysequence        {b1f12712-39b5-11ed-ba7e-e992dd4a9090}
displaymessageoverride  Recovery
recoveryenabled         Yes
isolatedcontext         Yes
allowedinmemorysettings 0x15000075
osdevice                partition=C:
systemroot              \WINDOWS
resumeobject            {4ae36b76-a304-11ed-beaa-d8a5cf26f6ec}
nx                      OptIn
bootmenupolicy          Standard
hypervisorlaunchtype    Auto
And use that to change the name:
bcdedit /set "{cc33f9c6-fe8b-11ed-a1cd-683e26c558cc}" description "Stream"
Restoring the default installation
You can also restore the default installation to the one you’re currently booted into by running:
bcdedit /default "{current}"
Finish
At this point, restart your computer. If everything goes to plan, Windows should drop you into the first time setup.